Rum Balls Recipe

Rum Balls

Recipe provided courtesy of Taste of Home magazine.  Find more great recipes at www.tasteofhome.com


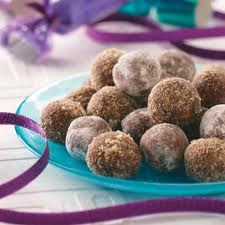
Rum flavor comes through nicely in these traditional Christmas sweets.  Roll half in powdered sugar and the other half in crushed vanilla wafers for visual appeal.

Audrey Larzon                                                                                   Bloomington, Minnesota

Rum Balls Recipe

Rum Balls

2 ½ cups crushed vanilla wafers (about 75 wafers)

1 cup ground pecan

1 cup confectioners’ sugar

2 Tbsp. plus 2 tsp. baking cocoa

¼ cup rum

3 Tbsp. honey

2 Tbsp. water

Additional confectioners’ sugar and/or crushed vanilla wafers

In a large bowl, combine the water crumbs, pecans, confectioners’ sugar and cocoa.  Combine the rum, honey and water; stir into crumb mixture.

Shape into 1 inch balls.  Roll in additional confectioners’ sugar and/or wafer crumbs.  Store in an airtight container.

Tip:  To save time and eliminate the mess, I place the sugar in a resealable plastic bag, add the cooled cookies and turn the bag a couple times.  You can sugar-coat the cookies without getting your fingers sticky.

(Recipe for Rum Balls was in Taste of Home Best Loved Cookies & Candies, December 31, 2012 issue)

Go onto my site:  annettes-sweet-treats.com, and leave a message – it’s at the top of each recipe on the right side…it will tell you to leave a comment.  I would like to know your thoughts on the recipe.

Hope you enjoyed the Rum Balls, if so, click “Like”.  I look forward to hearing from you, so let me know how you liked it!
PrintFriendlyShare

Cherry Icebox Cookies Recipe

Cherry Icebox Cookies

Recipe provided courtesy of Taste of Home magazine.  Find more great recipes at www.tasteofhome.com


As a home economics teacher, I often supplied treats for school functions, and these delectable cookies were always popular.  The colorful flecks of maraschino cherries turn ordinary cookies into something special.

Patty Courtney                                                                                 Jonesboro, Texas

Cherry Icebox Cookies Recipe

Cherry Icebox Cookies

1 cup butter, softened

1 cup sugar

¼ cup packed brown sugar

1 egg

¼ cup maraschino cherry juice

4 ½ tsp. lemon juice

1 tsp. vanilla

3 ¼ cups all-purpose flour

½ tsp. baking soda

½ tsp. ground cinnamon

¼ tsp. cream of tartar

½ cup chopped walnuts

½ cup chopped maraschino cherries

In a large bowl, cream butter and sugar until light and fluffy.  Beat in the egg, cherry and lemon juice and vanilla.  Combine dry ingredients; gradually add to creamed mixture and mix well.  Stir in nuts and cherries.

Shape into four 12 inch rolls; wrap each in plastic wrap.  Refrigerate for 4 hours or until firm.

Unwrap and cut into ¼ inch slices.  Place 2 inches apart on ungreased baking sheet.  Bake at 375 F. for 8-10 minutes or until the edges begin to brown.  Remove to wire racks to cool.

(Recipe for Cherry Icebox Cookies was in Taste of Home Best Loved Cookies & Candies, December 31, 2012 issue)

Go onto my site:  annettes-sweet-treats.com, and leave a message – it’s at the top of each recipe on the right side…it will tell you to leave a comment.  I would like to know your thoughts on the recipe.

Hope you enjoyed the Cherry Icebox Cookies, if so, click “Like”.  I look forward to hearing from you, so let me know how you liked it!

PrintFriendlyShare

Peanut Butter Christmas Mice Recipe

Peanut Butter Christmas Mice

Recipe provided courtesy of Taste of Home magazine.  Find more great recipes at www.tasteofhome.com.


These “mice” were always a hit at my children’s classroom parties.  Even though they’re grown, they still ask me to make these cookies for the holidays.

Nancy Rowse                                                                     Bella Vista, Arkansas


Peanut Butter Christmas Mice Recipe

Peanut Butter Christmas Mice

1 cup creamy peanut butter

½ cup butter, softened

½ cup sugar

½ cup packed brown sugar

1 egg

1 tsp. vanilla

1 ½ cups all-purpose flour

½ tsp. baking soda

½ cup peanut halves

2 Tbsp. green and red M&M’s miniature baking bits

4 tsp. miniature semi-sweet chocolate chips

Cake decorator holly leaf and berry candies

60 to 66 pieces red shoestring licorice (2 inches each)

In a large mixing bowl, cream peanut butter, butter and sugars.  Beat in egg and vanilla.  Combine flour and baking soda; gradually add to the creamed mixture.  (Dough will be soft.)  Refrigerate for 1 hour or until easy to handle.

Roll into 1 inch balls.  Place 2 inches apart on ungreased baking sheets.  Pinch each ball at one end to taper.  Insert two peanut halves in center of each ball for ears.  Add one M&M baking bit of nose and two chocolate chips for eyes (the tip of the chip goes into the dough).  Arrange holly and berry candies in front of one ear.

Bake at 350 F. for 8 to 10 minutes or until set.  Gently insert one licorice piece into each warm cookie for tail.  Remove to wire rack to cool completely.

EDITOR’S NOTE:  Reduced-fat or generic brands of peanut butter are not recommended for this recipe.

(Recipe for Peanut Butter Christmas Mice was in Taste of Home Best Loved Cookies & Bars, January 19, 2009 issue)

Go onto my site:  annettes-sweet-treats.com, and leave a message – it’s at the end of each recipe.  I would like to know what you think of the recipes.

Hope you enjoyed the Peanut Butter Christmas Mice cookies, if so, click “Like”.  I look forward to hearing from you, so let me know how you liked it!!

PrintFriendlyShare

Holly and Eggnog Pie Recipe


Holly and Eggnog Pie

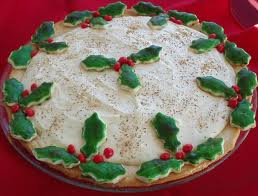
This Holly and Eggnog Pie has a unique crust and a creamy filling brimming with the flavors of the season.  It definitely says “Christmas”.  I had made this pie for my friend and I gave it to her 2 days before Christmas.  She loved this pie!

Holly and Eggnog Pie Recipe

Holly and Eggnog Pie

Crust:   1 (15 oz.) package Pillsbury All Ready Pie Crusts

1 egg, separated

6 – 8 drops red food color

6 – 8 drops green food color

Filling:    1 envelope unflavored gelatin

1 ½  cups eggnog

1 cup powdered sugar

¼ cup margarine, softened

2 (8 oz.) package cream cheese, softened

¼ tsp. nutmeg

½ tsp. rum extract

Allow both crust pouches to stand at room temperature for 20 minutes.  Heat oven to 450 F.  Prepare pie crust according to package directions for unfilled one crust pie using 9-inch pie pan.  Trim dough even with edge of pan.  To make decorative edge, using 2-inch holly leaf-shaped cutter or sharp knife or leaf pattern, cut 16 leaves from remaining crust.  From dough scraps, make twenty-four ¼ inch balls.  Beat egg white in small bowl.  Brush edge of crust with egg white.  Brush bottoms of leaves and balls with egg white and arrange around edge of crust to resemble holly leaves and berries.

Place half of egg yolk in each of 2 custard cups.  Add red food color to one and green food color to the other, mix well.  With small brush, paint green mixture on leaves; paint red mixture on berries.  Bake at 450 F. for 9 to 11 minutes or until lightly browned.  Cool completely.

In a small saucepan, evenly sprinkle gelatin over ½ cup of the eggnog; let stand 1 minute to soften gelatin.  Cook over medium heat, stirring constantly until gelatin is dissolved.  Remove from heat; set aside.  In large mixer bowl, combine powdered sugar, margarine and cream cheese.  Beat at low speed until light and fluffy.  Gradually add nutmeg, rum extract, gelatin mixture and remaining eggnog.  Beat on high speed until smooth.  Refrigerate 15 minutes or until mixture mounds slightly when stirred; pour into cooled crust.  Refrigerate until firm, about 4 hours.  If desired, sprinkle with nutmeg.  Store in refrigerator.         10 servings

TIPS:  If desired, cut and paint additional holly leaves and berries to decorate surface of pie.  Bake on ungreased cookie sheet at 450 F. for 4 minutes or until lightly browned.  Position on pie as desired.

Unused pie crust dough can be baked into sweet treats.  Using 2-inch cookie cutters with sugar, colored sugar or a cinnamon-sugar mixture.  Bake on ungreased cookie sheet at 450 F. for 5 to 8 minutes or until light golden brown.

(Recipe for Holly and Eggnog Pie was in Pillsbury Classic Cookbook, Holiday, Keeping in Touch with Family and Friends, 1992 issue)

Go onto my site:  annettes-sweet-treats.com, and leave a message – it’s at the top of each recipe on the right side…it will tell you to leave a comment.  I would like to know your thoughts on the recipe.

Hope you enjoyed the Holly and Eggnog Pie, if so, click “Like”.  I look forward to hearing from you, so let me know how you liked it!

PrintFriendlyShare

Peppermint Stick Cookies Recipe

Peppermint Stick Cookies

Recipe provided courtesy of Taste of Home magazine.  Find more great recipes at www.tasteofhome.com


I tore this recipe out of a magazine many years ago.  With their cool mint flavor and festive look, these whimsical creations will make you feel like you’re at the North Pole.  The chilled dough is easy to shape, too.

Nancy Knapke                                                                                   Fort Recovery, Ohio

Peppermint Stick Cookies Recipe

Peppermint Stick Cookies

1 cup unsalted butter, softened

1 cup sugar

1 egg

2 tsp. mint extract

½ tsp. vanilla

2 ¾ cups all-purpose flour

½ tsp. salt

12 drops red food coloring

12 drops green food coloring

1 ½ cups white baking chips

Crushed mint candy

In a large bowl, cream butter and sugar until light and fluffy.  Beat in egg and extracts.  Combine flour and salt; gradually add to the creamed mixture and mix well.

Set aside half of the dough.  Divide remaining dough half; add green food coloring to one portion and red food coloring to the other.  Wrap dough separately in plastic wrap.  Refrigerate for 1-2 hours or until easy to handle.

Divide green and red dough into 24 portions each.  Roll Divide plain dough into 48 portions.  Roll each into a 4 inch rope.  Place each green rope next to white rope; press together gently and twist.  Repeat with red ropes and remaining white ropes.  Place 2 inches apart on ungreased baking sheets.

Bake at 350 F. for 10-12 minutes or until set.  Cool for 2 minutes before carefully removing from pans to wire racks to cool completely.

In a microwave, melt white chips; stir until smooth.  Dip cookie ends into melted chips; allow excess to drip off.  Sprinkle with crushed candies and place on waxed paper.  Let stand until set.  Store in an airtight container.

(Recipe for Peppermint Stick Cookies was in Taste of Home Best Loved Cookies & Candies, December 31, 2012 issue)

Go onto my site:  annettes-sweet-treats.com, and leave a message – it’s at the top of each recipe on the right side…it will tell you to leave a comment.  I would like to know your thoughts on the recipe.

Hope you enjoyed the Peppermint Stick Cookies, if so, click “Like”.  I look forward to hearing from you, so let me know how you liked it!
PrintFriendlyShare

Cranberry Swirl Biscotti Recipe

Cranberry Swirl BiscottiRecipe provided courtesy of Taste of Home magazine.  Find more great recipes at www.tasteofhome.com


A friend of mine, who is known for her excellent cookies, shared this recipe with me.  The mix of cranberries and cherry preserves is so refreshing.

Lisa Kilcup                                                                                Gig Harbor, Washington

Cranberry Swirl Biscotti Recipe

Cranberry Swirl Biscotti

2/3 cup dried cranberries

½ cup cherry preserves

½ tsp. ground cinnamon

½ cup butter, softened

2/3 cup sugar

2 eggs

1 tsp. vanilla

2 ¼ cups all-purpose flour

¾ tsp. baking powder

¼ tsp. salt

GLAZE:  ¾ cup confectioners’ sugar

1 Tbsp. 2% milk

2 tsp. butter, melted

1 tsp. almond extract

In a food processor, combine the cranberries, preserves and cinnamon.  Cover and process until smooth; set aside.

In a large bowl, cream butter and sugar until light and fluffy.  Beat in eggs and vanilla.  Combine the flour, baking powder and salt; gradually add to creamed mixture and mix well.

Divide dough in half.  On a lightly floured surface, roll each portion into a 12 x 8 inch rectangle.  Spread each with cranberry filling; roll up jelly-roll style, starting with a short side.

Place seam side down 4 inches apart on a lightly greased baking sheet.  Bake at 325 F. for 25 – 30 minutes or until lightly browned.

Carefully transfer log to a cutting board; cool 5 minutes. With serrated knife, cut into ½ inch slices.  Place 2 inches apart on lightly greased baking sheets.  Bake 15 minutes longer or until centers are firm and dry.  Remove to wire racks.

In a small bowl, combine the glaze ingredients; drizzle over warm biscotti.  Cool completely.  Store in an airtight container.

(Recipe for Cranberry Swirl Biscotti was in Taste of Home Best Loved Cookies & Candies, December 31, 2012 issue)

Go onto my site:  annettes-sweet-treats.com, and leave a message – it’s at the top of each recipe on the right side…it will tell you to leave a comment.  I would like to know your thoughts on the recipe.

Hope you enjoyed the Cranberry Swirl Biscotti, if so, click “Like”.  I look forward to hearing from you, so let me know how you liked it!

PrintFriendlyShare

Chocolate Macadamia Meltaways Recipe

Chocolate Macadamia Meltaways

Recipe provided courtesy of Taste of Home magazine.  Find more great recipes at www.tasteofhome.com


I came up with these unbelievable meltaways purely by accident one day while trying to make cookies using the ingredients in my cupboard.  The result was fantastic!

Barbara Sepcich                                                                                Galt, California

Chocolate Macadamia Meltaways Recipe

Chocolate Macadamia Meltaways

½ cup butter, softened

¼ cup confectioners’ sugar

½ tsp. vanilla

1 ¼ cups all-purpose flour

1 jar (3 ½ oz.) macadamia nuts, finely chopped

Filling:   1 cup (6 oz.) semi-sweet chocolate chips

½ cup coarsely chopped macadamia nuts

Additional confectioners’ sugar

In a small bowl, cream butter and sugar light and fluffy.  Beat in vanilla.  Gradually add flour and mix well.  Stir in nuts (dough will be stiff); set aside.

For filling, in a microwave-safe bowl, melt chocolate chips; stir until smooth.  Stir in nuts; cool slightly.  Drop ½ teaspoonfuls onto a waxed paper-lined baking sheet; cover and refrigerate for 30 minutes.

Shape teaspoonfuls of dough around each piece of chocolate-nut mixture so it is completely covered.  Place 2 inches apart on ungreased baking sheets.

Bake at 375 F. for 12-14 minutes or until lightly browned.  Roll warm cookies in confectioners’ sugar; cool on wire racks.

(Recipe for Chocolate Macadamia Meltaways was in Taste of Home Best Loved Cookies & Candies, December 31, 2012 issue)

Go onto my site:  annettes-sweet-treats.com, and leave a message – it’s at the top of each recipe on the right side…it will tell you to leave a comment.  I would like to know your thoughts on the recipe.

Hope you enjoyed the Chocolate Macadamia Meltaways, if so, click “Like”.  I look forward to hearing from you, so let me know how you liked it!

PrintFriendlyShare

Mocha Chocolate Crackle Cookies Recipe

Mocha Chocolate Crackle Cookies

Recipe provided courtesy of Taste of Home magazine.  Find more great recipes at www.tasteofhome.com


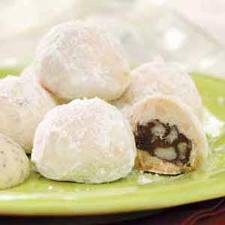
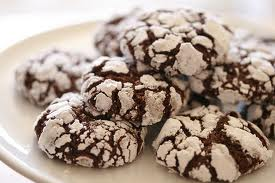
Generations have grown up making chocolate crackle cookies.  This modern twist on a beloved classic adds coffee extract for a rich mocha flavor.  Crackle cookies have tender, fudgy insides and crispy, crackly outsides.  Make some sweet memories today.

Mocha Chocolate Crackle Cookies Recipe

Mocha Chocolate Crackle Cookies

2 cups + 2 Tbsp. all-purpose flour

2 tsp. baking powder

4 oz. unsweetened chocolate

½ cup vegetable oil

½ tsp. salt

2 Tbsp. + 1 tsp. instant coffee

1 cup Dixie Crystals extra fine granulated sugar

1 cup well packed Dixie Crystals dark brown sugar

4 eggs

¾ cup Dixie Crystals confectioners powdered sugar

Preheat oven to 350 F.

Sift together flour and baking powder and set aside.

Chop chocolate and place in bowl with oil and salt.  Heat over double boiler until chocolate is melted.  Remove from heat.

Using a rolling pin crush instant coffee until powdered.  Add to above.

Allow to slightly cool until lukewarm.

Once cooled, add both sugars and whisk in eggs one at a time.  Add flour and mix until combined.

Place in refrigerator until firm, about 2-3 hours.  Line cookie sheet with parchment paper and set aside.

Shape chilled dough into tablespoon size and drop in powdered sugar.  Make into round balls and roll generously in powdered sugar.  Place on cookie sheets bounces back when lightly pressed in center, about 12 – 13 minutes.

(Recipe for Mocha Chocolate Crackle Cookies was in Taste of Home Best Loved Cookies & Candies, December 31, 2012 issue)

Go onto my site:  annettes-sweet-treats.com, and leave a message – it’s at the top of each recipe on the right side…it will tell you to leave a comment.  I would like to know your thoughts on the recipe.

Hope you enjoyed the Mocha Chocolate Crackle Cookies, if so, click “Like”.  I look forward to hearing from you, so let me know how you liked it!
PrintFriendlyShare

Italian Rainbow Cookies Recipe

Italian Rainbow Cookies

Recipe provided courtesy of Taste of Home magazine.  Find more great recipes at www.tasteofhome.com


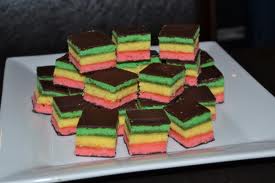
My family has made these classic Italian cookies for generations.  This homemade version is so much better than what you’ll find on the bakery shelf – I promise!

Cindy Casazza                                                                 Hopewell, New Jersey


Italian Rainbow Cookies Recipe

Italian Rainbow Cookies

4 eggs

1 cup sugar

3 ½ oz. almond paste, cut into small pieces

1 cup all-purpose flour

1 cup butter, melted and cooled

½ tsp. salt

½ tsp. almond extract

6 to 8 drops red food coloring

6 to 8 drops green food coloring

¼ cup seedless raspberry jam

Glaze:   1 cup (6 oz.) semisweet chocolate chips

1 tsp. shortening

In a large bowl, beat eggs and sugar for 2 to 3 minutes or until thick and lemon-colored.  Gradually add almond paste; mix well.  Gradually add the flour, butter, salt and extract.

Divide batter into thirds.  Tint one portion red and one portion green; leave remaining portion plain.  Spread one portion into each of three well-greased 11 inch x 7 inch baking dishes.

Bake at 375 F. for 7 – 11 minutes or until a toothpick inserted near center comes out clean and edges begin to brown.  Cool for 10 minutes before removing from pans to wire rack to cool completely.

Place red layer on waxed paper; spread with 2 tablespoons jam.  Top with plain layer and remaining jam.  Add green layer; press down gently.

For glaze, in a microwave, melt chocolate chips and shortening; stir until smooth.  Spread half over green layer.  Refrigerate for 20 minutes or until set.  Turn over; spread remaining glaze over red layer.  Refrigerate for 20 minutes or until set.

With a sharp knife, trim edges.  Cut rectangle lengthwise into fourths.  Cut each portion into ¼ inch slices.


(Recipe for Italian Rainbow Cookies was in Taste of Home Best Loved Cookies & Candies, December 31, 2012 issue)

Go onto my site:  annettes-sweet-treats.com, and leave a message – it’s at the top of each recipe on the right side…it will tell you to leave a comment.  I would like to know your thoughts on the recipe.

Hope you enjoyed the Italian Rainbow Cookies, if so, click “Like”.  I look forward to hearing from you, so let me know how you liked it!
PrintFriendlyShare

Holiday Star Cookie Recipe

Holiday Star Cookies

Recipe provided courtesy of Taste of Home magazine.  Find more great recipes at www.tasteofhome.com.


These lovely treats are both a cookie and a candy.  A melted hard-candy center looks like stained glass surrounded by a frosted cutout cookie.

Holiday Star Cookie Recipe

Holiday Star Cookies

1 ½ cups butter, softened

1 ½ cups sugar

2 eggs

3 tsp. vanilla

4 ½ cups all-purpose flour

1 tsp. each baking soda, cream of tartar and salt

Assorted colors of Jolly Rancher hard candies

1 Tbsp. Meringue powder

3 Tbsp. plus ½ tsp. water

2 2/3 cups confectioners’ sugar

Assorted colors of paste food coloring

White edible glitter

In a large mixing bowl, cream butter and sugar until light and fluffy.  Add eggs, one at a time, beating well after each addition.  Beat in vanilla.  Combine the flour, baking soda, cream of tartar and salt; gradually add to the creamed mixture.  Divide into three portions; cover and refrigerate for 30 minutes or until easy to handle.

Roll out one portion between two pieces of parchment paper to ¼ inch thickness.  Cut with floured 5 inch star shaped cookie cutter.  Cut out centers with 2 ½ inch star shaped cookie cutter.  Place larger cutouts 2 inch apart on parchment lined baking sheets.  Repeat with remaining dough; reroll small cutouts if desired.

Place the same color of hard candies in small resealable plastic bags; crush candies.  Sprinkle in center of each.  Bake at 350 F. for 8 – 10 minutes or until lightly browned.  Cool for 2 -3 minutes or until candies are set before carefully removing to wire racks.

In a small mixing bowl, beat meringue powder and water until soft peaks form.  Gradually add the confectioner’ sugar.  Tint icing to match the selected candies.  Decorate cookies with icing and sprinkle with edible glitter if desired.

(Recipe for Holiday Star Cookies was in Taste of Home Best Loved Cookies and bars, January 19, 2009 issue)

Go onto my site:  annettes-sweet-treats.com, and leave a message – it’s at the top of each recipe on the right side…it will tell you to leave a comment.  I would like to know your thoughts on the recipe.

Hope you enjoyed the Holiday Star Cookies, if so, click “Like”.  I look forward to hearing from you, so let me know how you liked it!!

PrintFriendlyShare